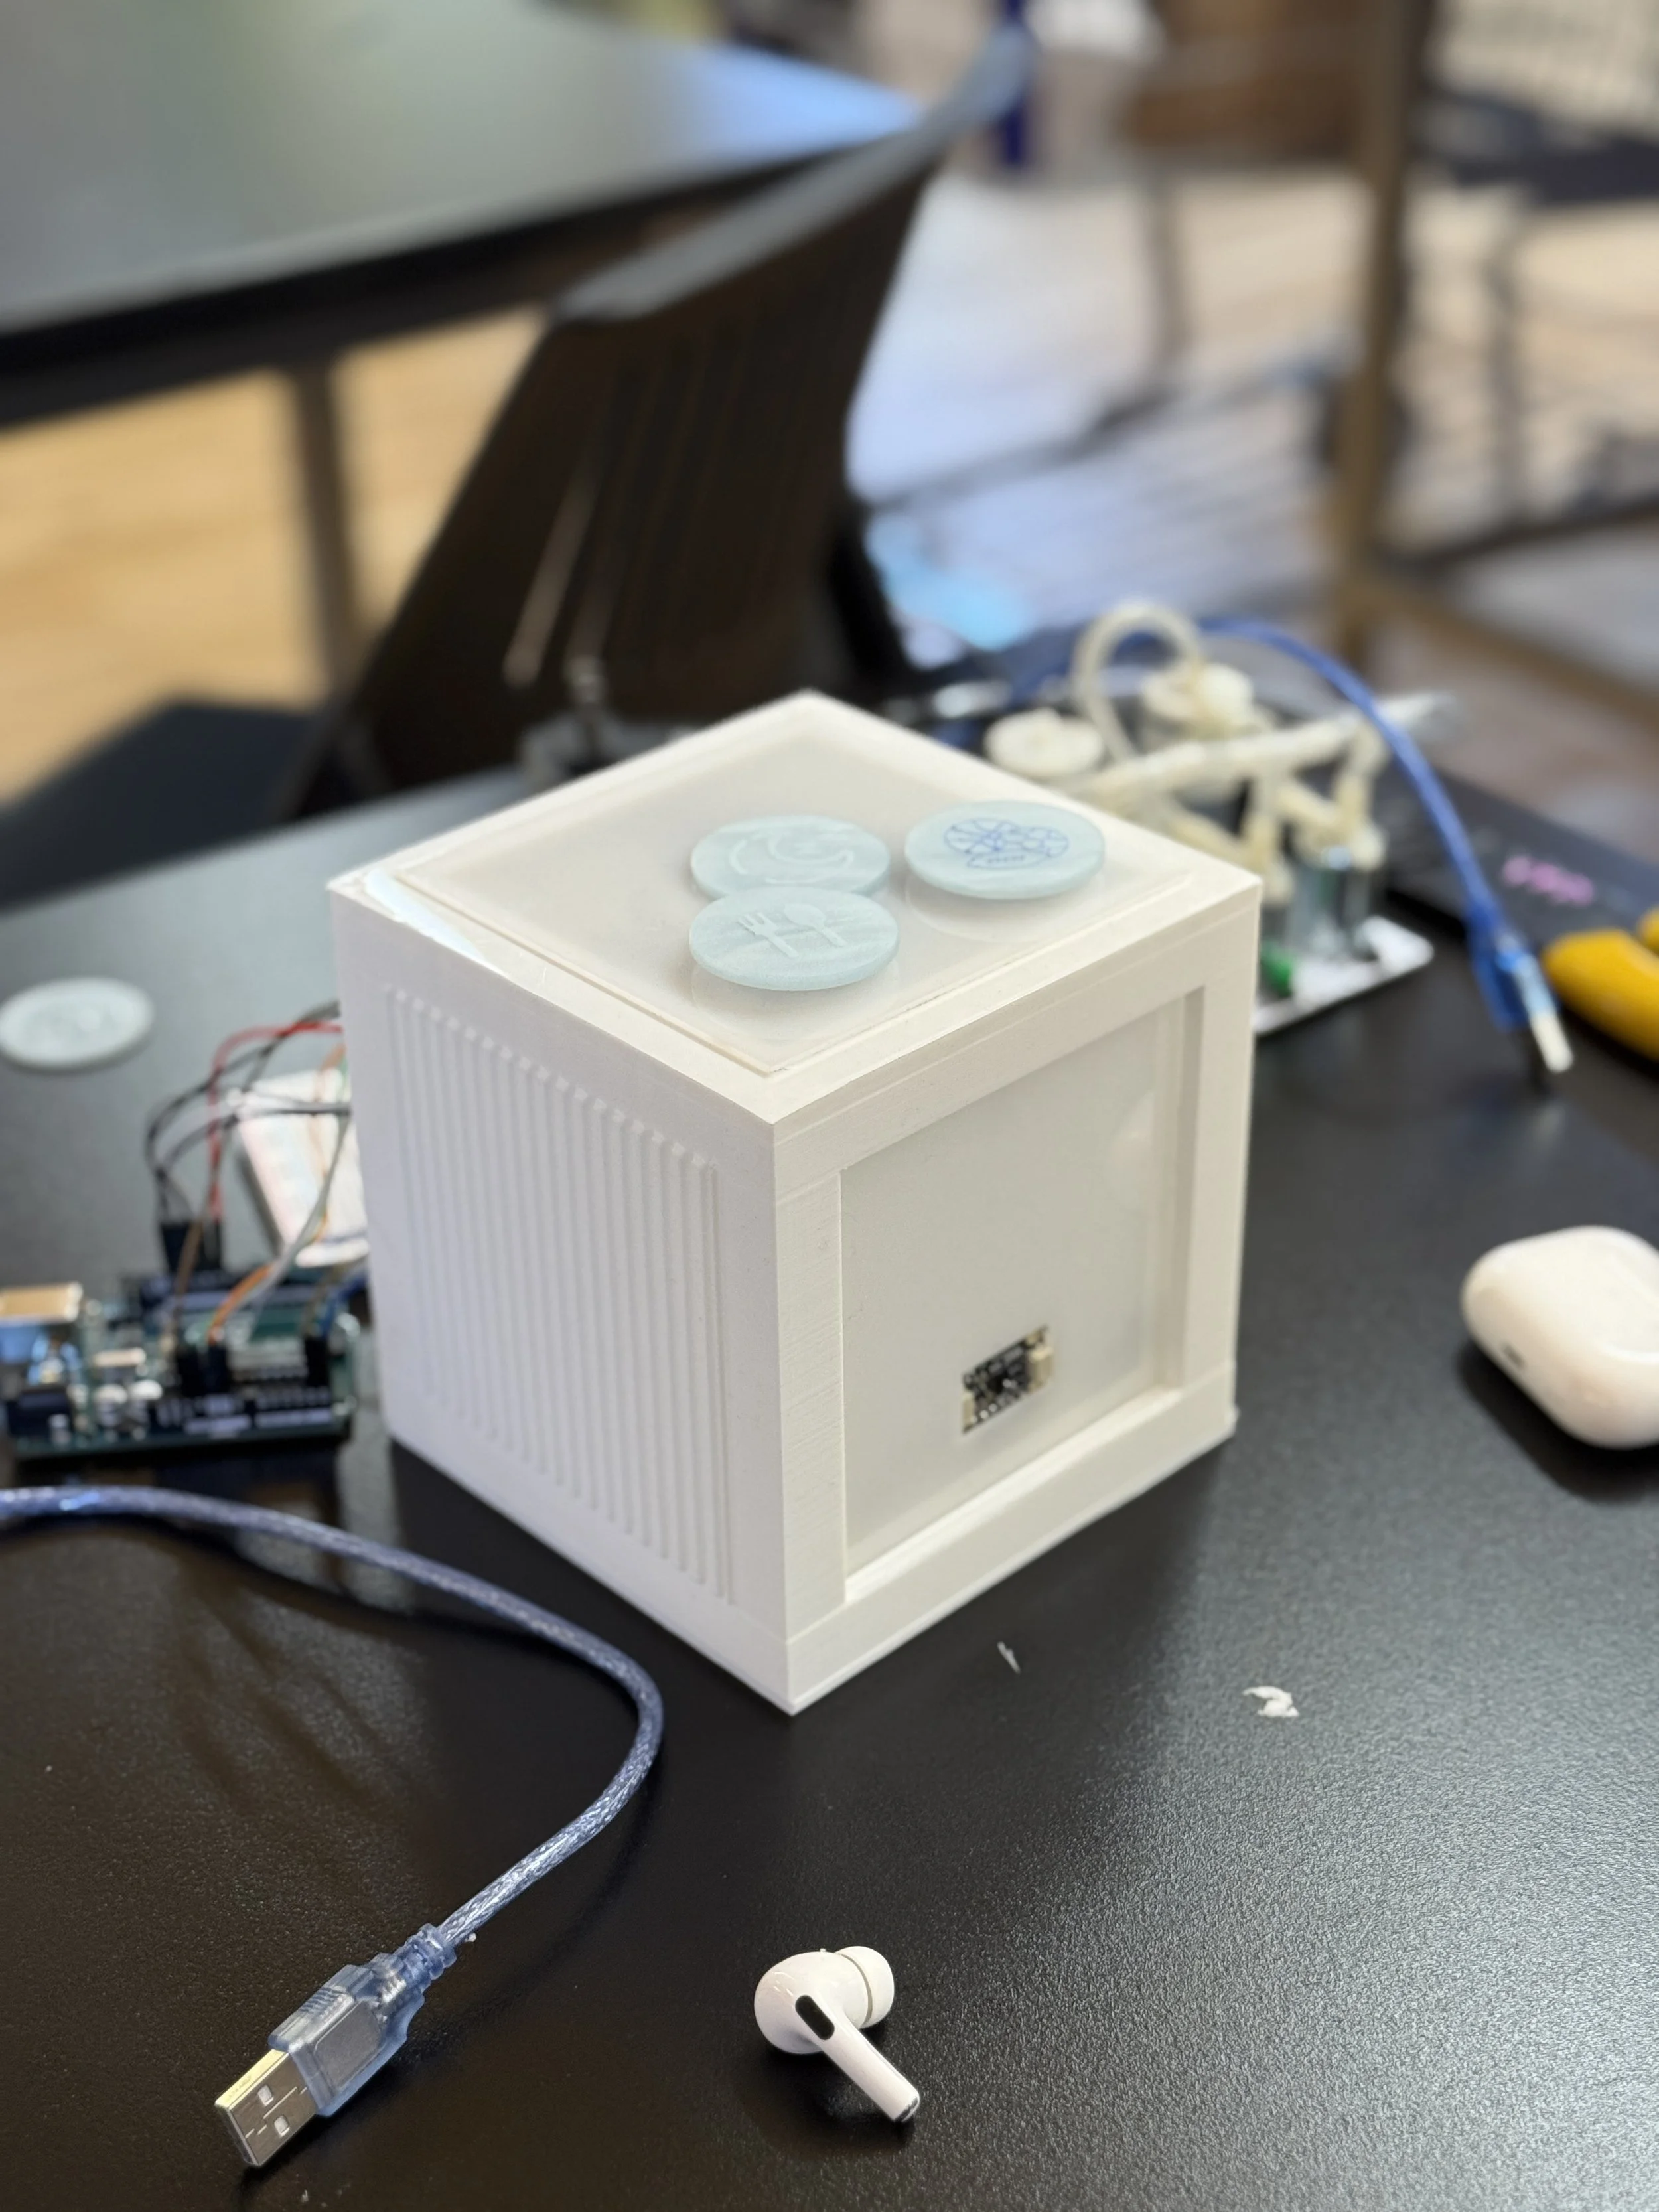
Tamagotchi Cube
Interactive companion inspired by virtual pets and emotional caregiving
A screenless interactive companion exploring emotional feedback through proximity and RFID-based care.
4 Week Project · Solo · 2025
Concept · Interaction Design · Prototyping · Arduino
THE IDEA
Designing emotional connection without screens
Most digital companions rely on screens, text, and notifications.
As interactions become increasingly visual and information-heavy, the emotional dimension of technology often feels reduced to interfaces rather than behavior.
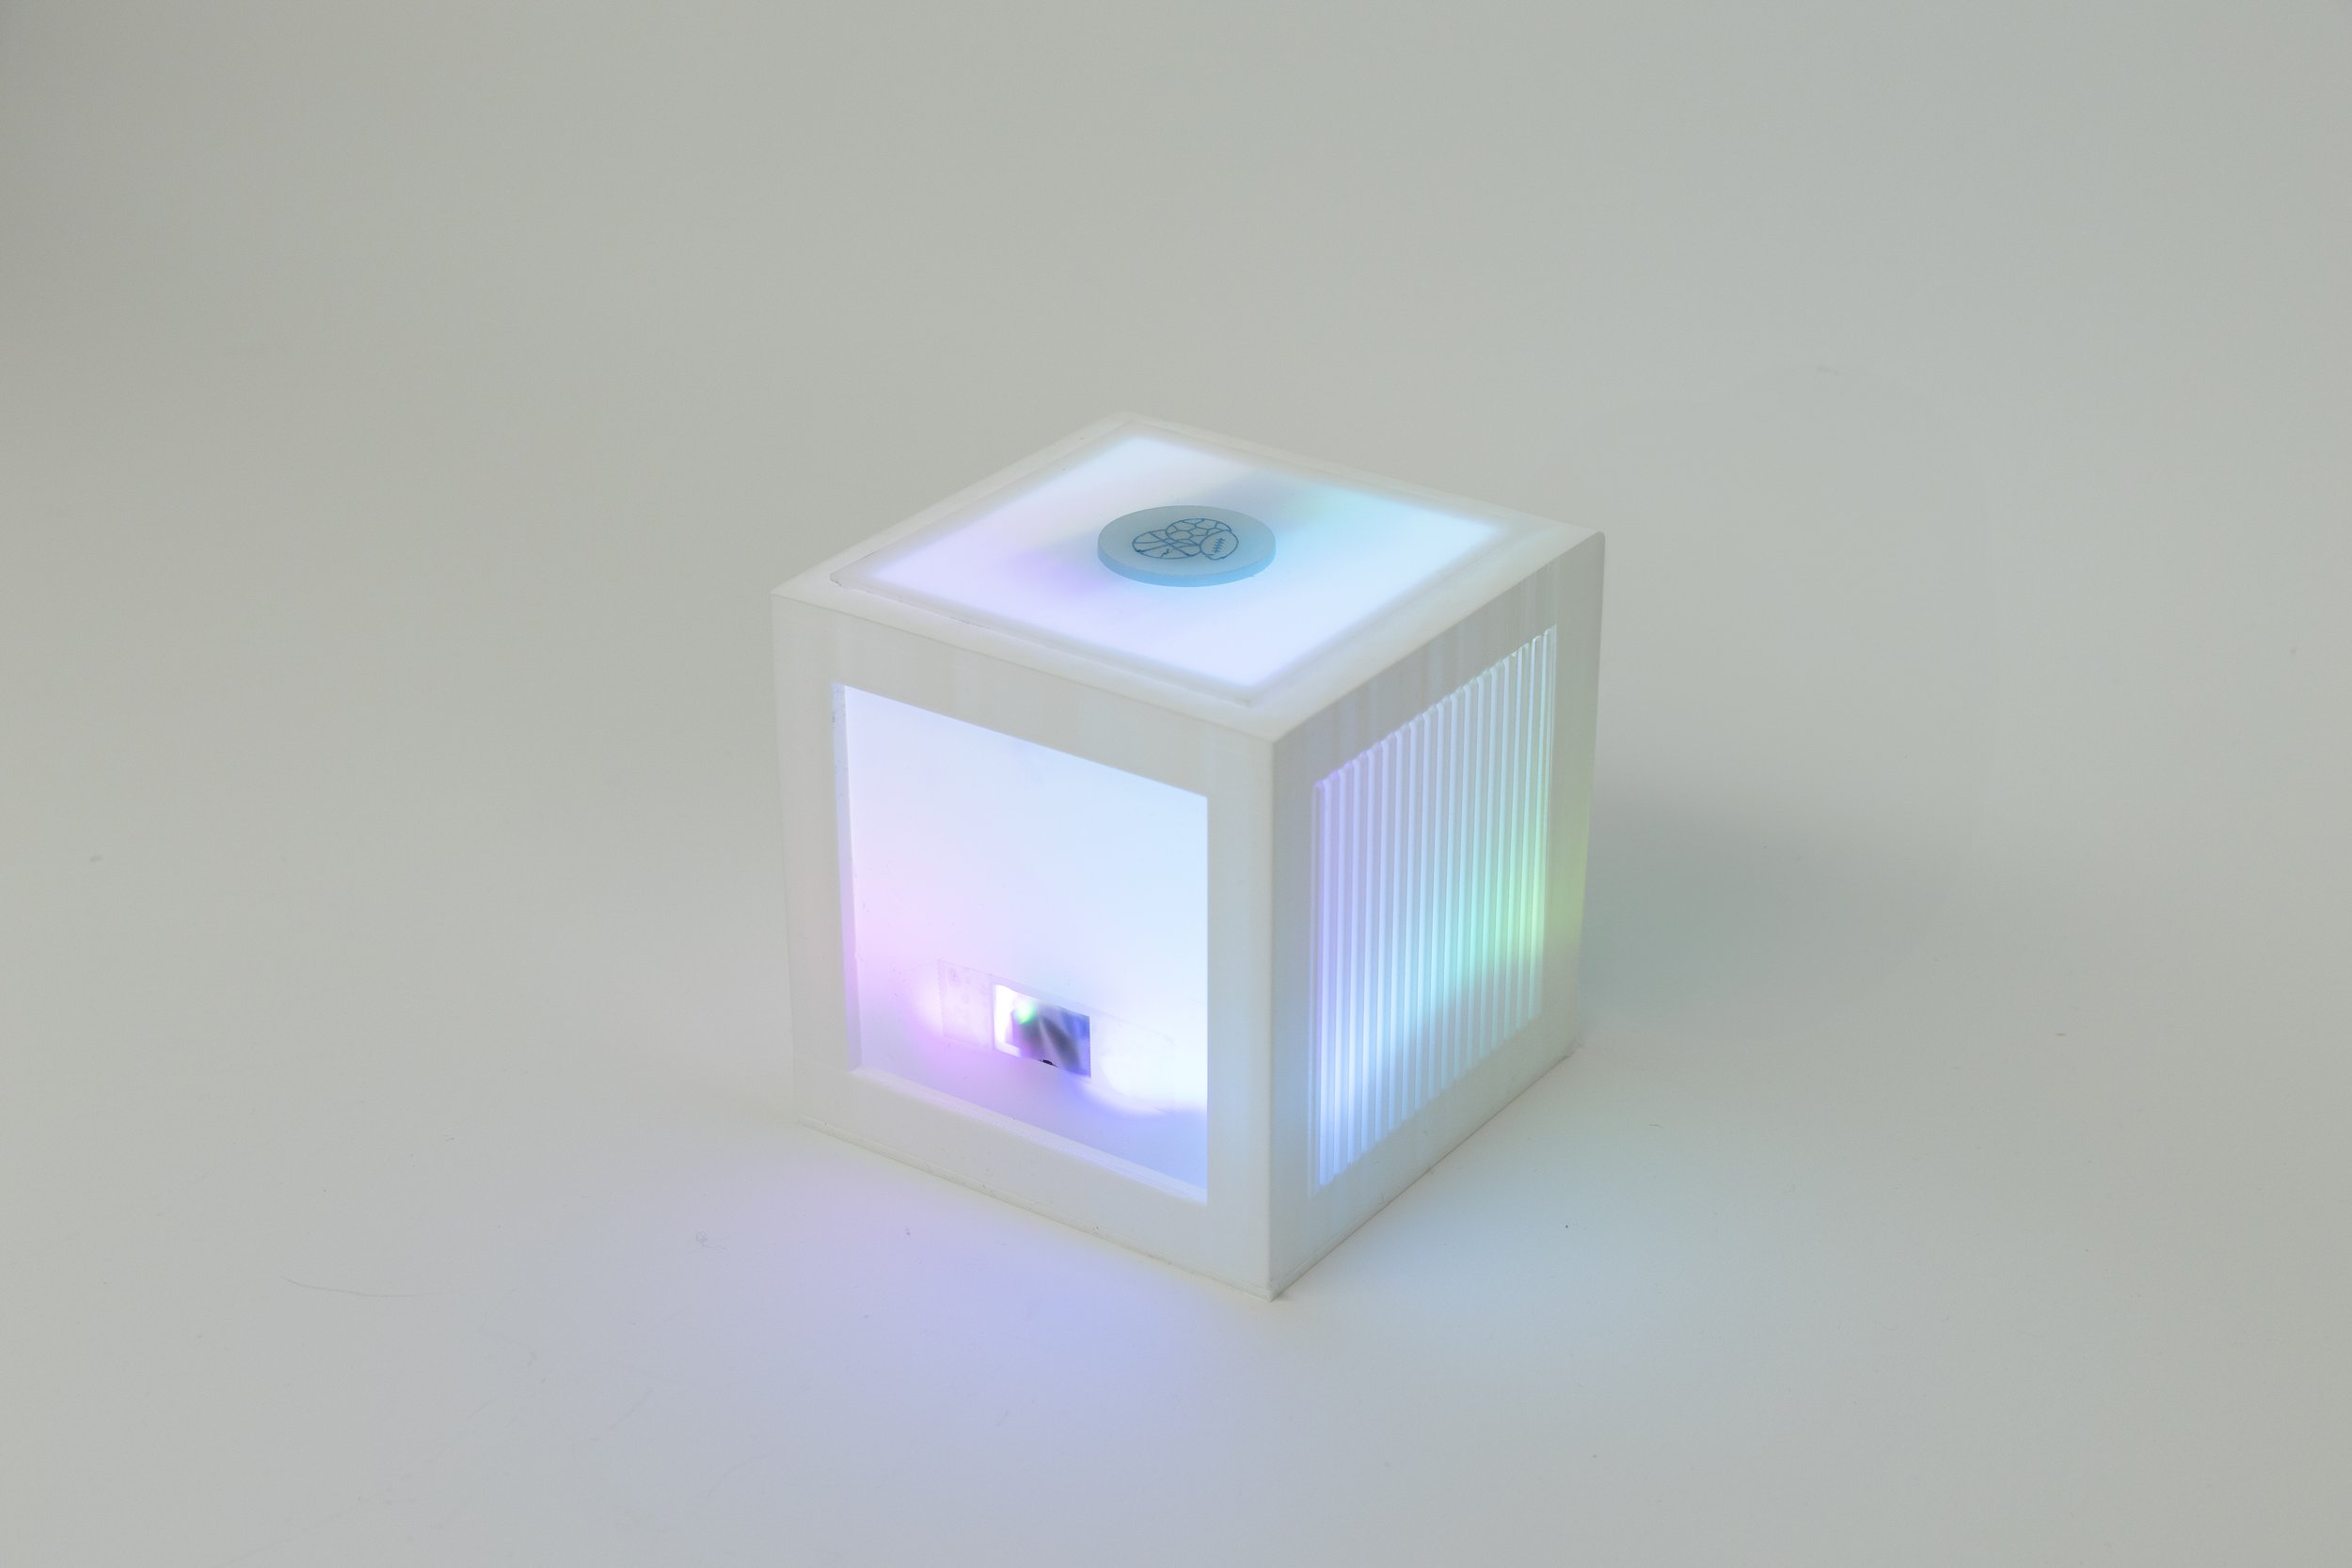
Tamagotchi Cube reimagines digital companionship as a physical, screenless system — where emotion is expressed through light, proximity, and interaction.
THE PROBLEM
Current smart and interactive devices are primarily transactional.
They respond to commands, but rarely cultivate a sense of care or subtle emotional feedback.
The challenge was to design an object that:
Communicates emotional states without language
Encourages repeated care-based interaction
Builds attachment through minimal but meaningful behavioral cues
THE APPROACH
Tamagotchi Cube creates a simple behavioral feedback loop.
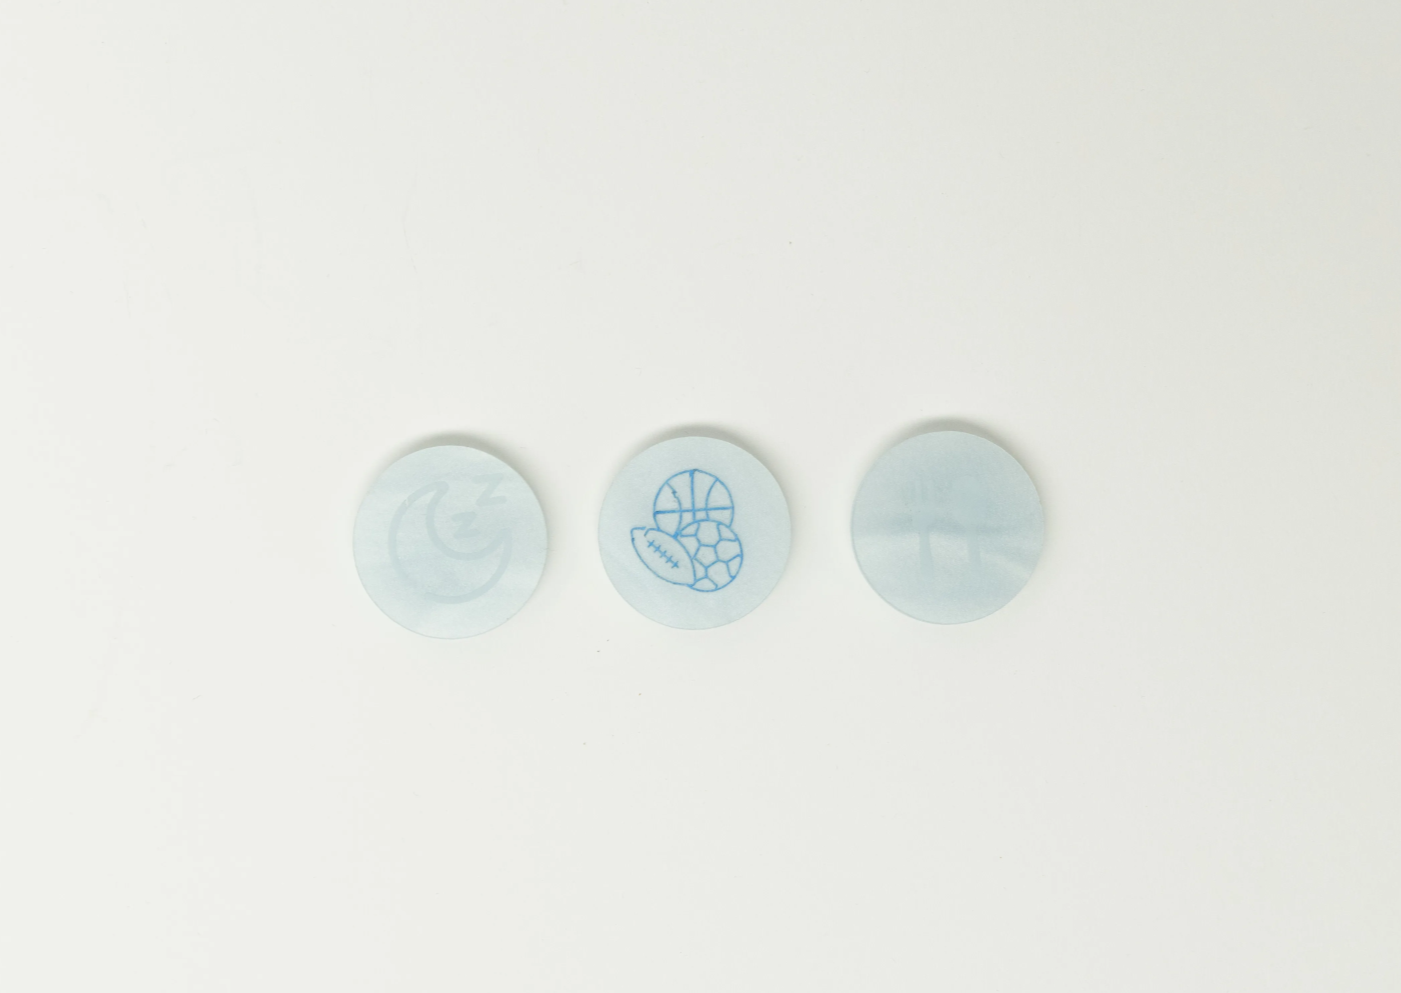
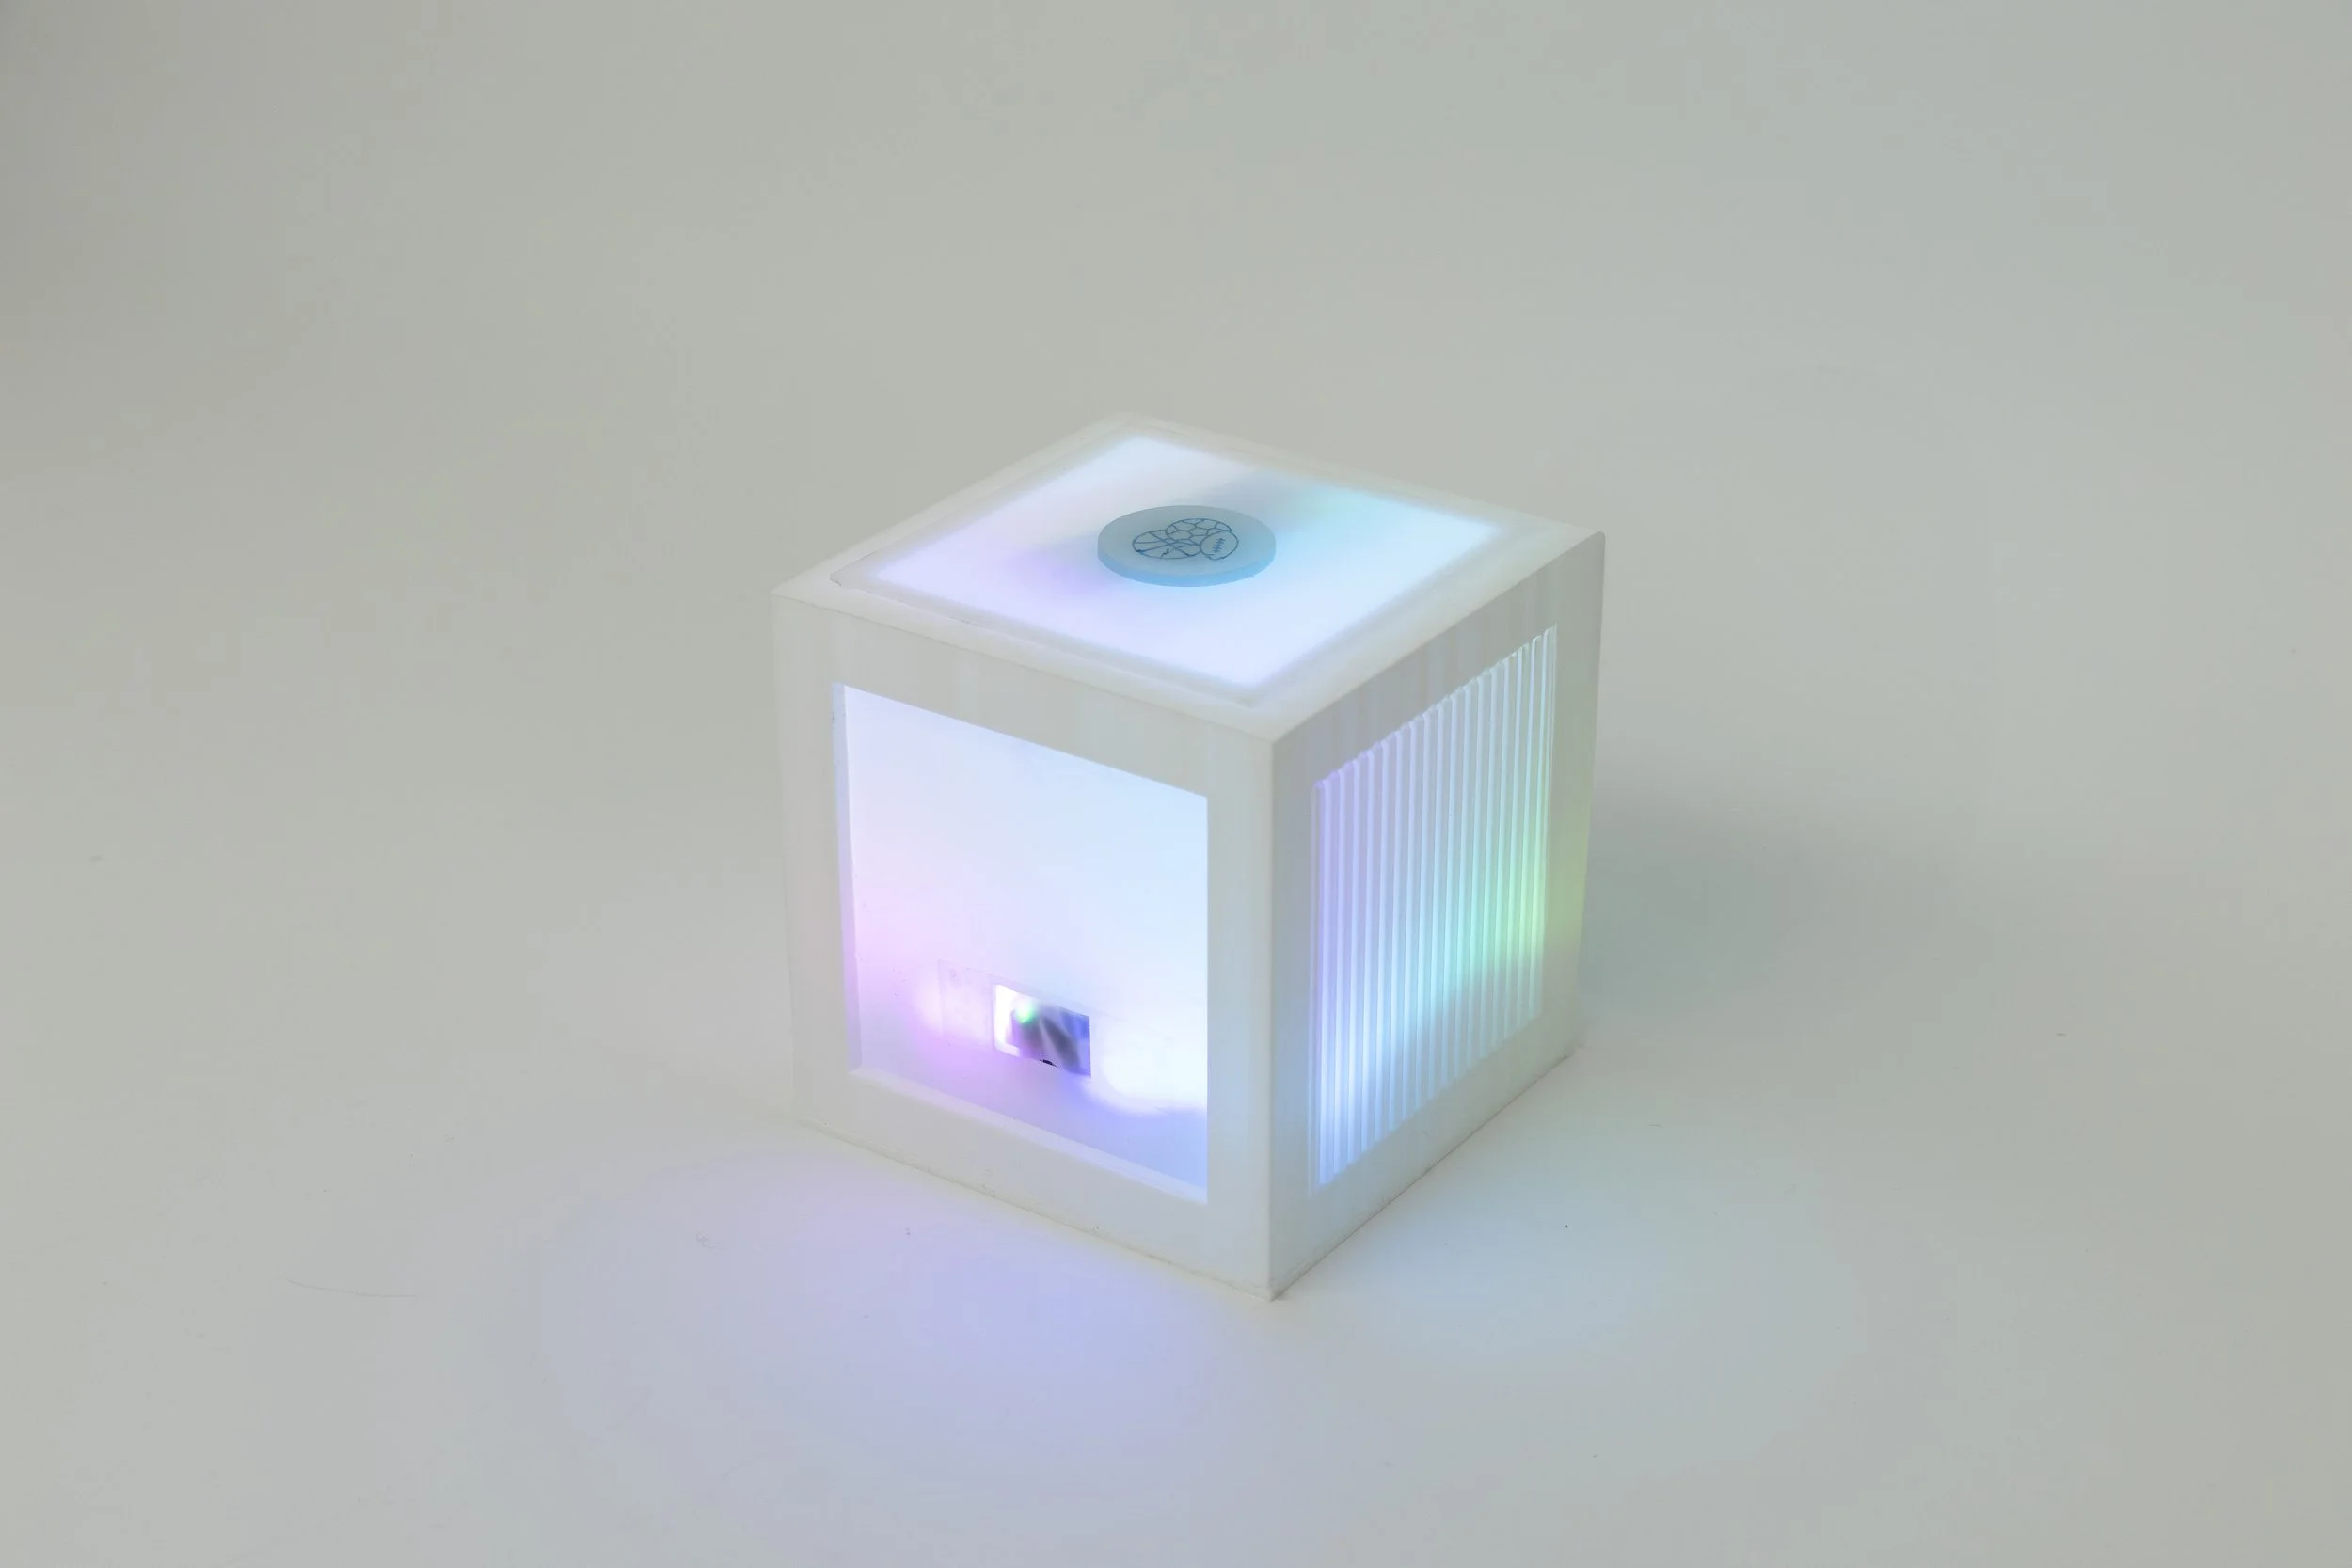
As a user approaches, the cube becomes aware. Its light intensity increases, shifting into an emotional state represented by color. The user responds by inserting an RFID “care chip” (food, activity, comfort). The cube then evaluates the input and reacts accordingly.
Correct care triggers a celebratory rainbow animation.
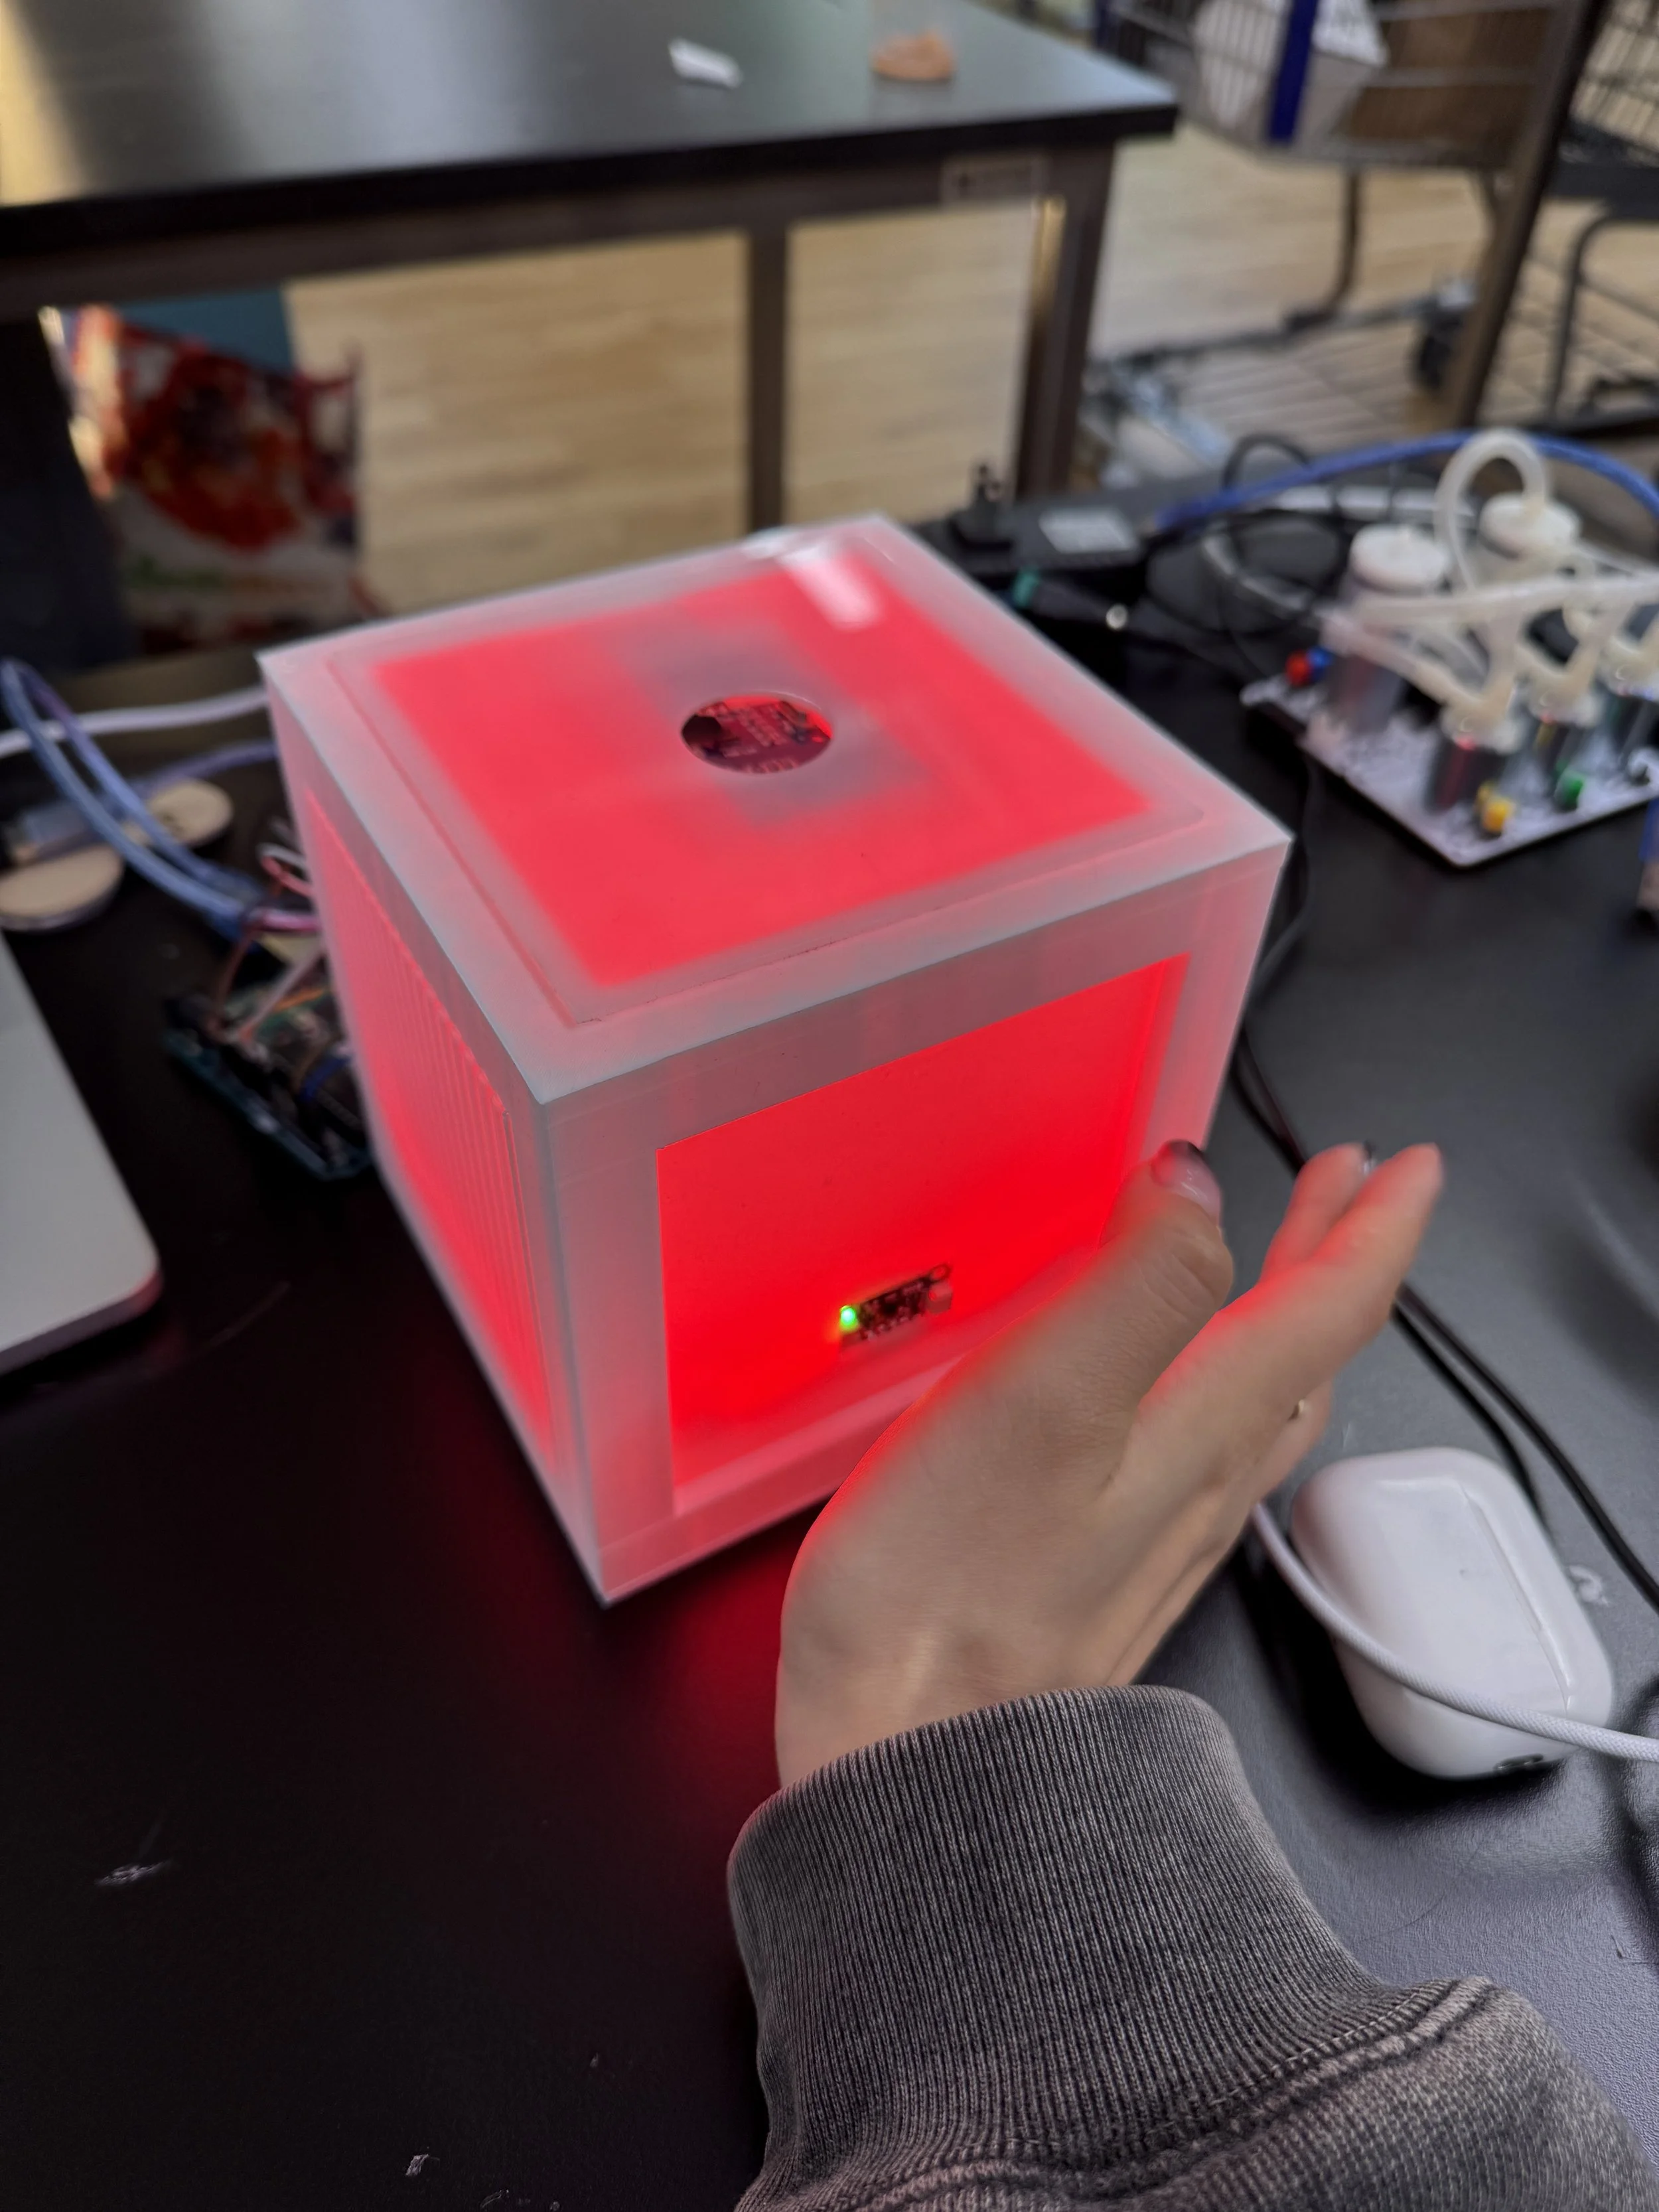
Incorrect care results in a red pulse before resetting.
By removing explicit instructions and visual UI, the project explores how emotional interpretation can emerge from subtle system behavior.
Process | design | fabrication
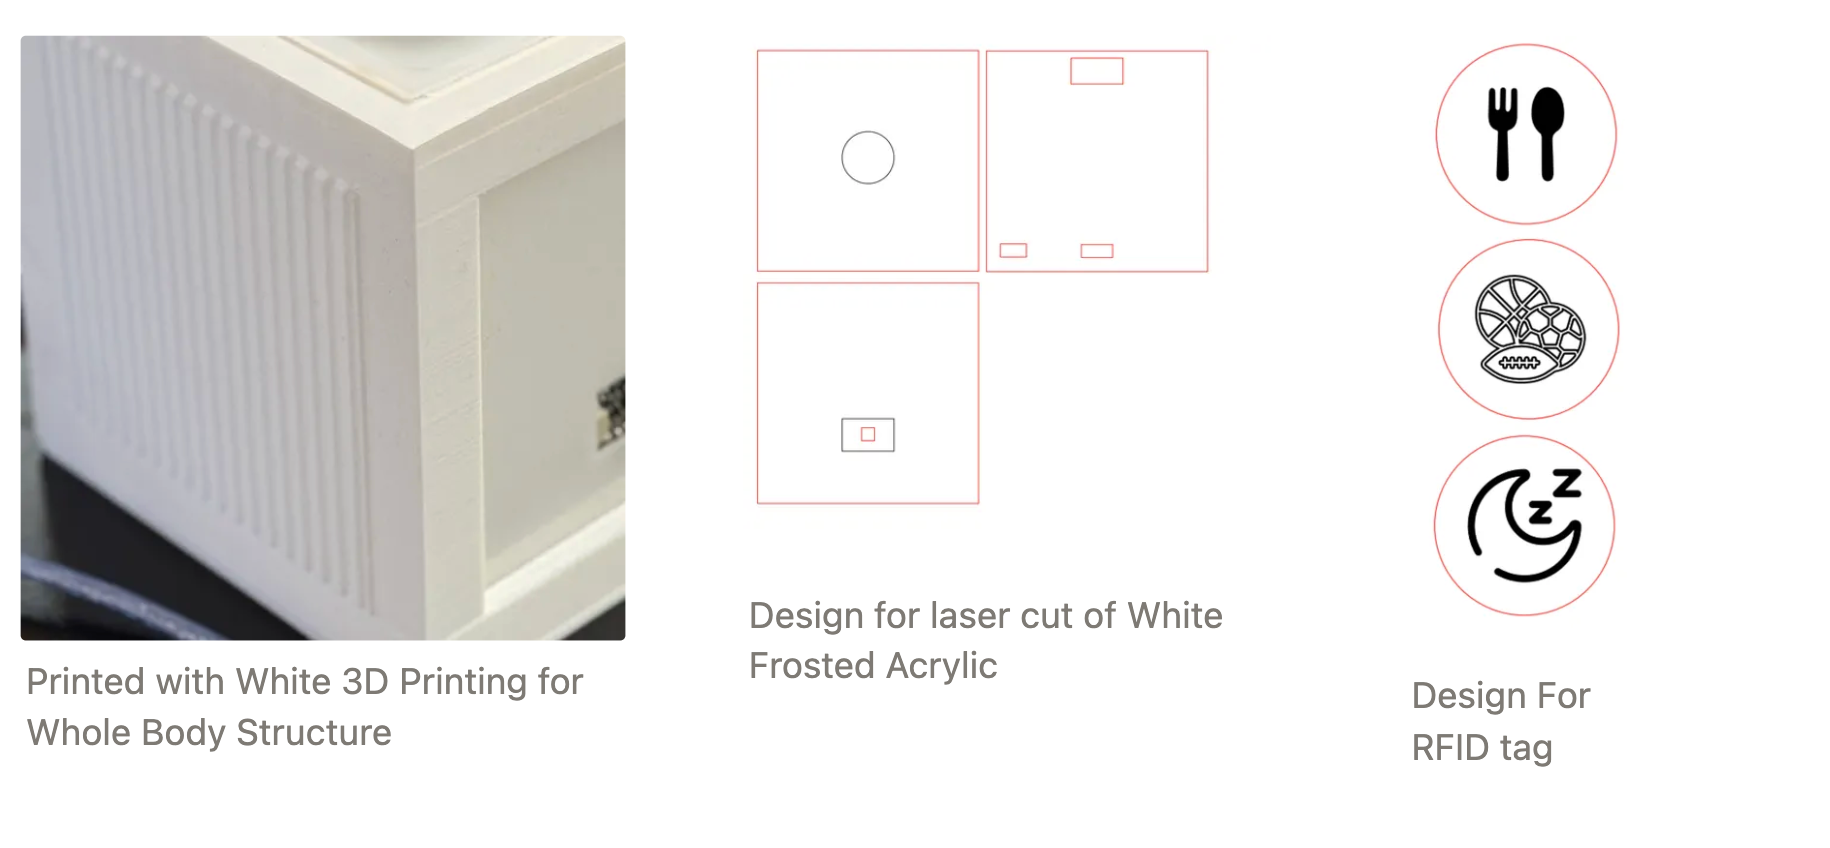
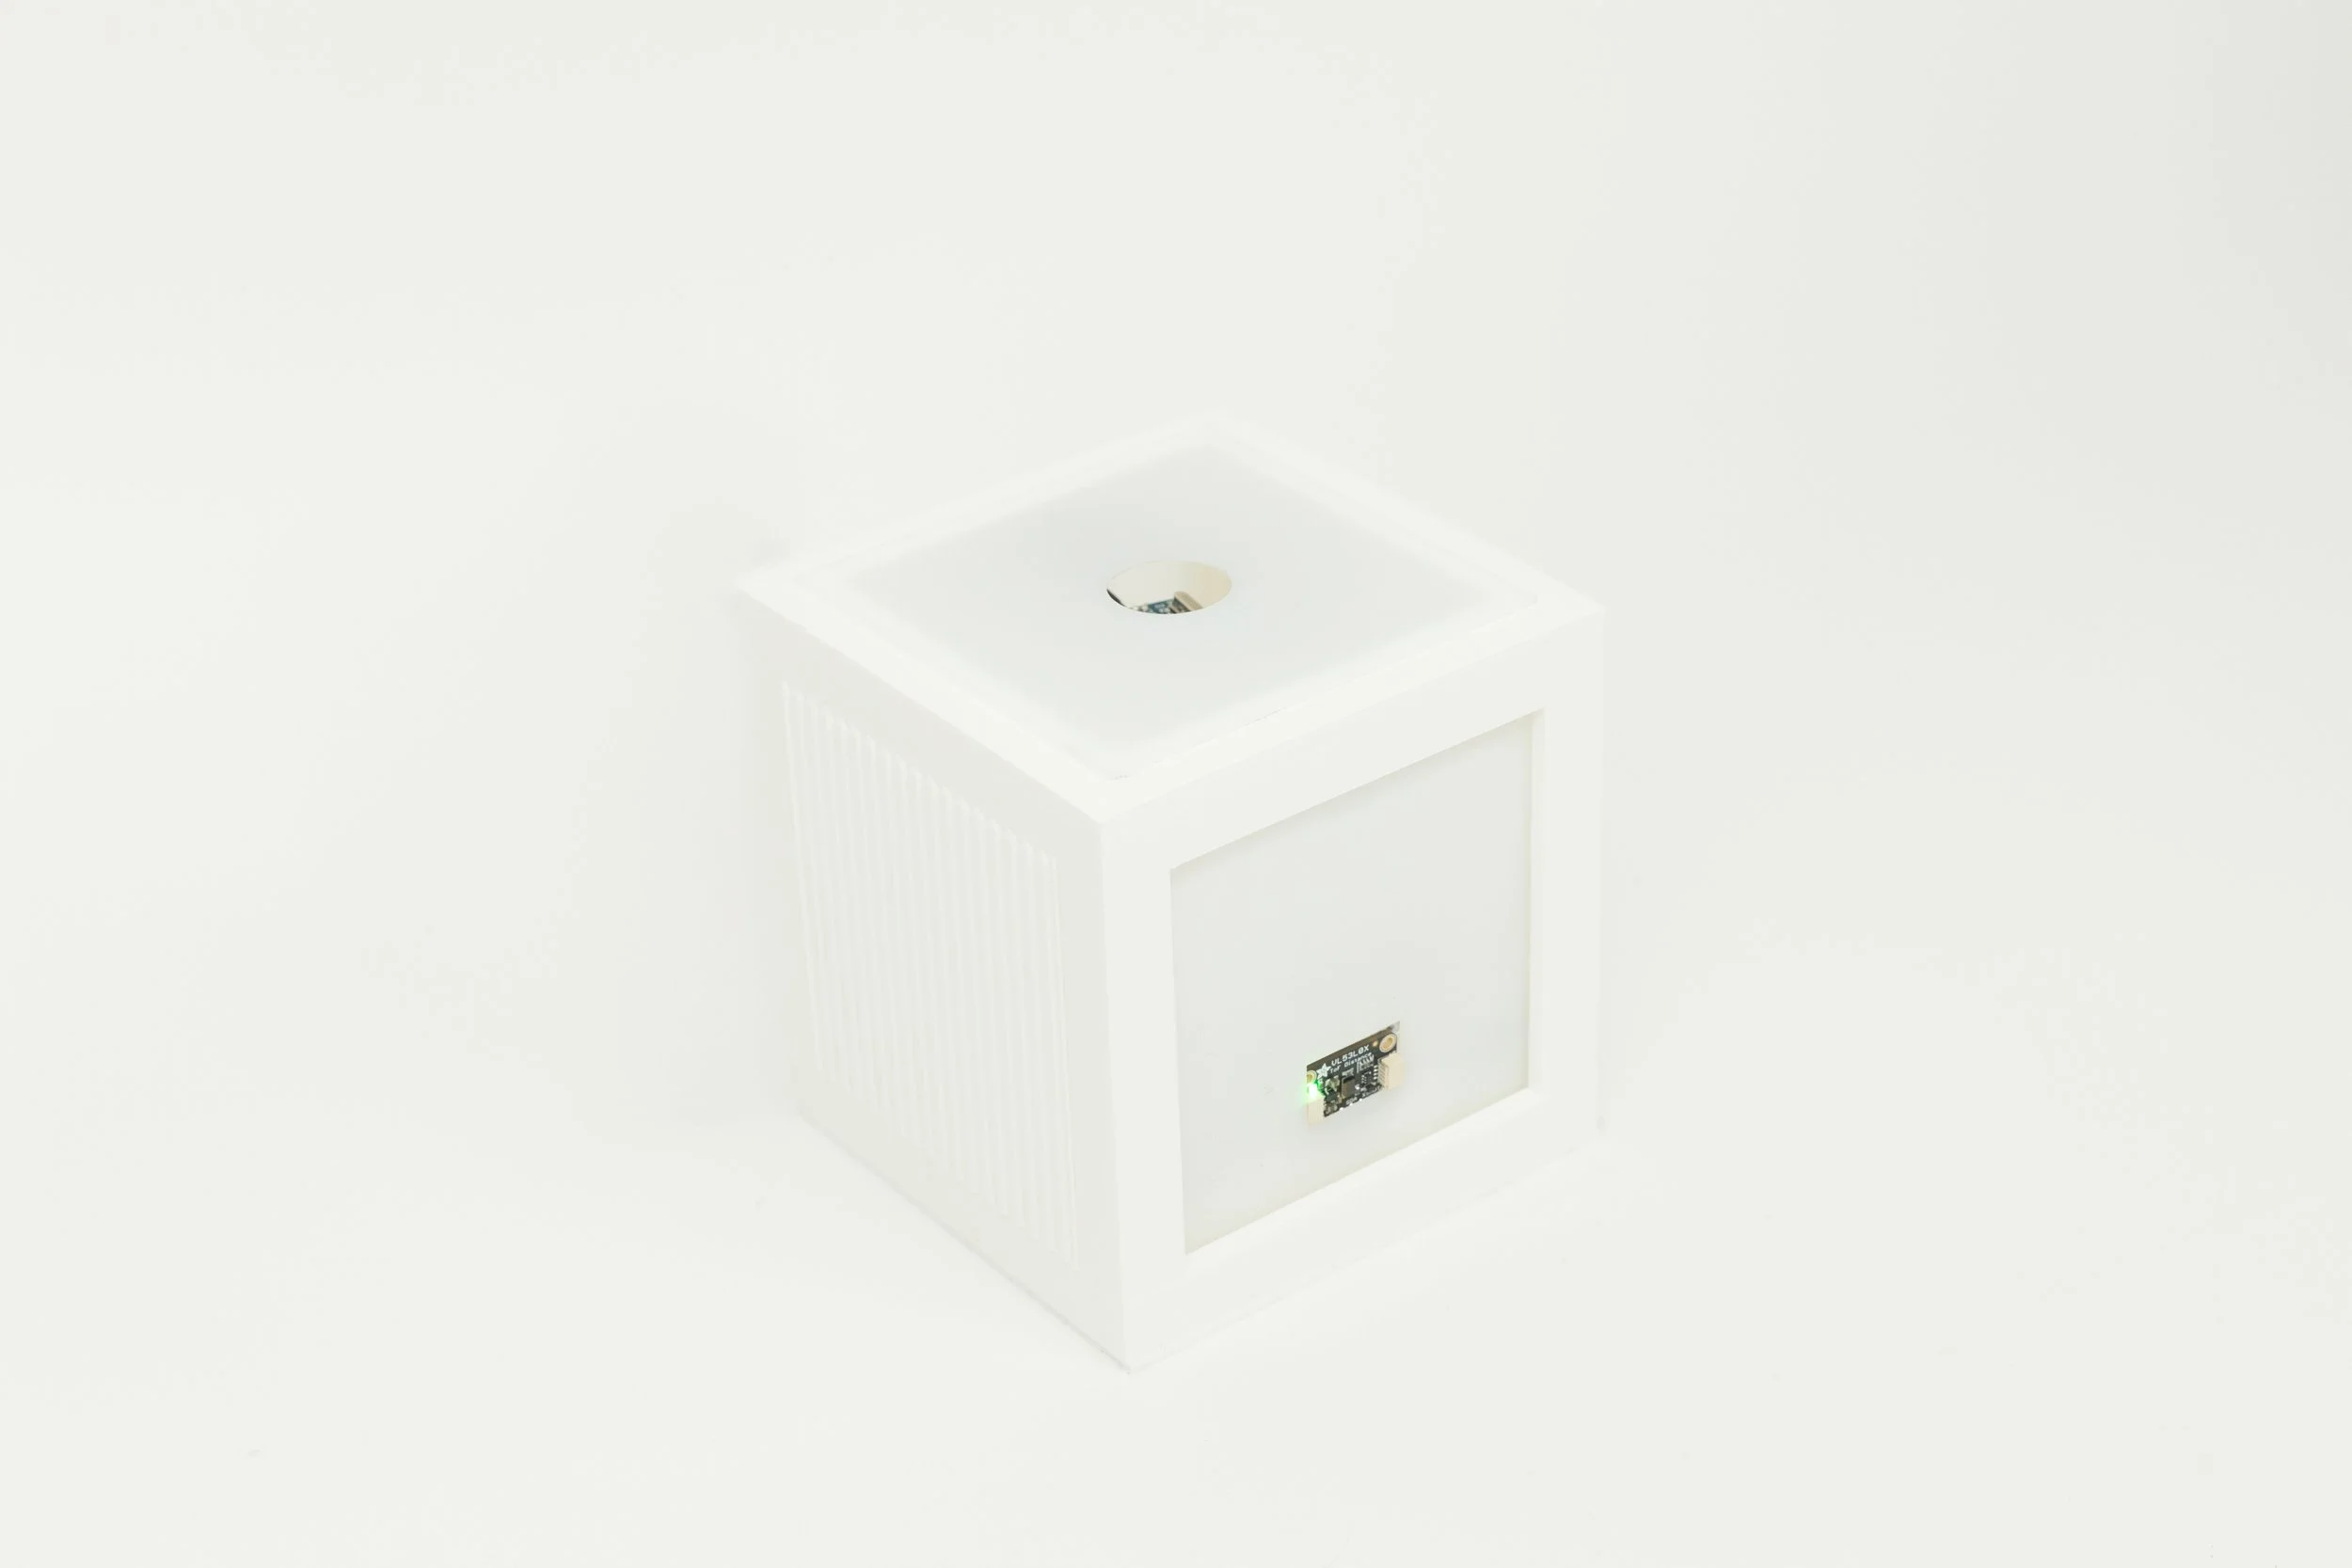
The cube form was modeled in SolidWorks and designed to:

Conceal electronic components
Diffuse light evenly
Maintain a minimal, approachable object language
Material exploration focused on translucency and internal reflection to avoid harsh LED exposure and maintain a soft emotional glow.
Internal layout planning prioritized wiring clarity and modular assembly.

Initial prototyping began with breadboard-based sensor testing and light behavior tuning. Early iterations revealed that timing and brightness transitions significantly affected perceived personality.
Subsequent enclosure iterations refined internal spacing, LED diffusion, and RFID placement to improve interaction clarity.
Behavioral logic was adjusted through repeated testing to create a balance between responsiveness and anticipation.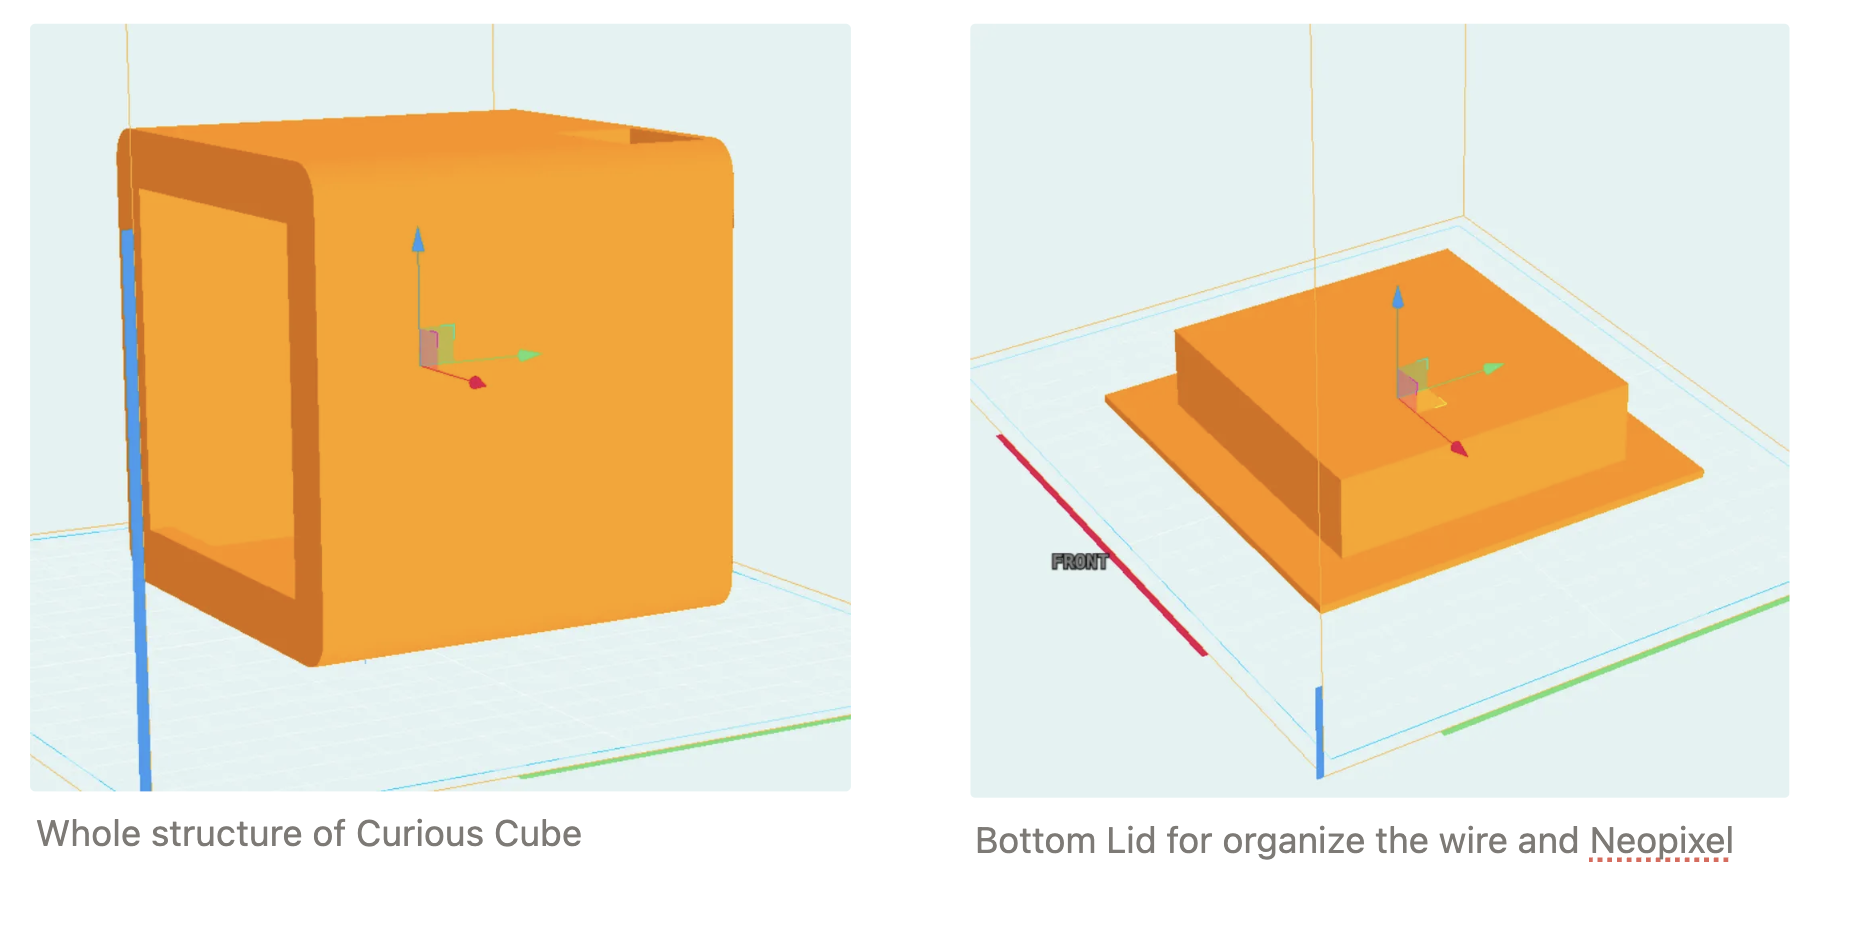
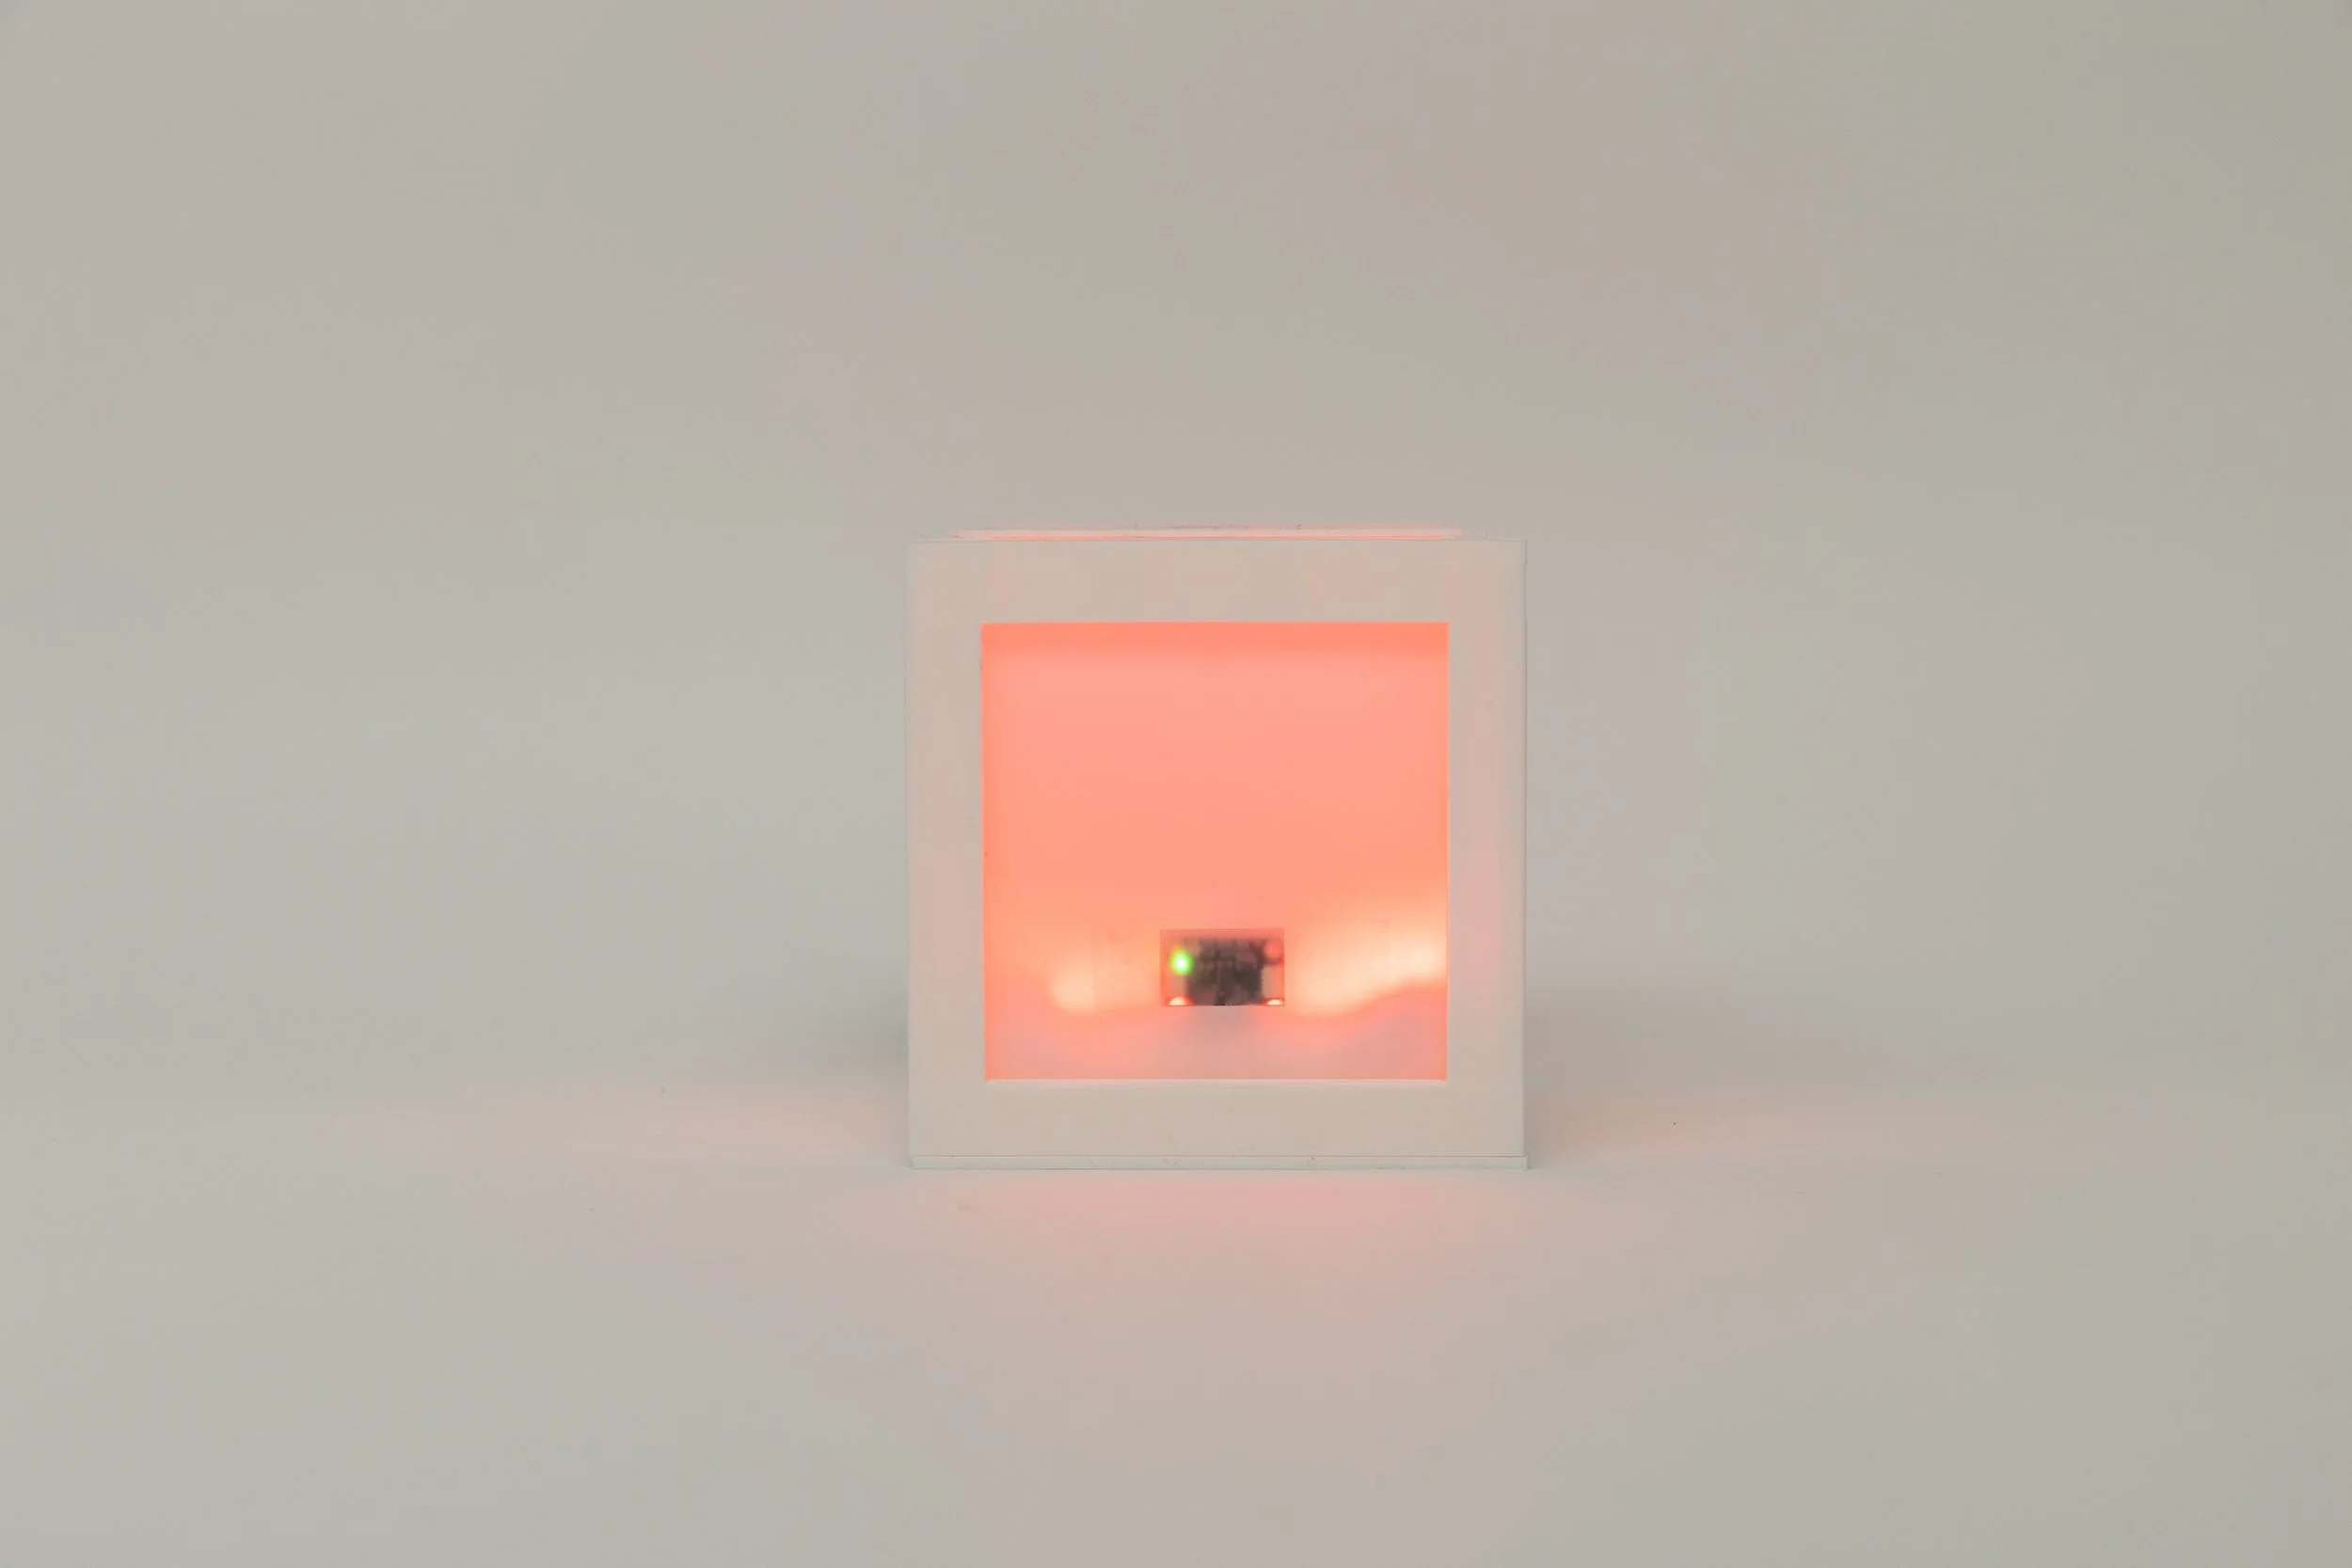
EMOTIONAL STATES
The cube communicates its internal state entirely through color and light behavior.
Pink — Neutral
Default state when the user is nearby but interaction has not yet begun.
Red — Angry
Indicates unmet needs or incorrect care input.
Green — Steady
A calm and content state, signaling balance while remaining responsive.
Rainbow — Happy
Triggered when the user provides correct care.
A celebratory animation lasting approximately 20 seconds.
Rather than using text or sound, the system relies on timing and transition curves to shape perceived personality.
Interaction Flow
Proximity Detection
A VL53L0X Time-of-Flight sensor measures distance.Emotional Expression
NeoPixel LEDs shift color and brightness to indicate internal state.Care Action (RFID Input)
The user inserts a tagged care chip into the top opening.System Response
Arduino-based logic evaluates the match and triggers behavioral output.
THE SYSTEM
Input
– VL53L0X Time-of-Flight Sensor (distance detection)
– MFRC522 RFID Reader (care chip identification)
Processing
– Arduino Uno
– State-based behavioral logic
– Timed transition sequencing
Output
– NeoPixel LED strip
– Diffused light enclosure
-
#include <SPI.h>
#include <MFRC522.h>
#include <Adafruit_NeoPixel.h>
#include <Wire.h>
#include <Adafruit_VL53L0X.h>
#define SS_PIN 10
#define RST_PIN 9
#define NEOPIXEL_PIN 7
#define NUM_PIXELS 40
#define TOTAL_PIXELS 80
MFRC522 rfid(SS_PIN, RST_PIN);
Adafruit_NeoPixel pixels(TOTAL_PIXELS, NEOPIXEL_PIN, NEO_GRB + NEO_KHZ800);
Adafruit_VL53L0X lox = Adafruit_VL53L0X();
unsigned long lastEmotionChangeTime = 0;
const unsigned long EMOTION_CHANGE_INTERVAL = 10000; // Change emotion every 10 seconds
byte tagIds[][4] = {
{209, 221, 145, 73},
{193, 223, 145, 73},
{97, 220, 145, 73}
};
int currentEmotion = -1; // -1: Pink, 0: Angry, 1: Steady
byte* correctTag;
int currentBrightness = 1;
void setup() {
Serial.begin(115200);
SPI.begin();
rfid.PCD_Init();
pixels.begin();
pixels.setBrightness(currentBrightness);
setPink();
turnOffExtraLEDs();
pixels.show();
Wire.begin();
if (!lox.begin()) {
Serial.println(F("Failed to boot VL53L0X"));
while(1);
}
randomSeed(analogRead(0));
Serial.println("System initialized. Approach the VL53L0X sensor.");
}
void loop() {
long distance = measureDistance();
updateNeoPixelBasedOnDistance(distance);
if (distance <= 100) {
if (currentEmotion == -1 && millis() - lastEmotionChangeTime > EMOTION_CHANGE_INTERVAL) {
showRandomEmotion();
lastEmotionChangeTime = millis();
}
handleRFIDTag();
}
delay(100);
}
long measureDistance() {
VL53L0X_RangingMeasurementData_t measure;
lox.rangingTest(&measure, false);
if (measure.RangeStatus != 4) {
return measure.RangeMilliMeter;
} else {
return 2000; // Return a large value when out of range
}
}
void updateNeoPixelBasedOnDistance(long distance) {
if (distance <= 1000) {
int targetBrightness;
if (distance > 100) { // Pink color with increasing brightness
targetBrightness = map(distance, 1000, 100, 1, 255);
targetBrightness = constrain(targetBrightness, 1, 255);
currentEmotion = -1;
} else { // Full brightness when distance <= 100 mm (10 cm)
targetBrightness = 255;
if (currentEmotion == -1) {
showRandomEmotion();
}
}
// Smooth brightness transition
if (currentBrightness < targetBrightness) {
currentBrightness++;
} else if (currentBrightness > targetBrightness) {
currentBrightness--;
}
pixels.setBrightness(currentBrightness);
if (currentEmotion == -1) {
setPink();
}
pixels.show();
}
}
void showRandomEmotion() {
currentEmotion = random(2); // Only Angry (0) or Steady (1)
correctTag = tagIds[currentEmotion];
switch (currentEmotion) {
case 0:
setAngry();
break;
case 1:
setSteady();
break;
}
pixels.show();
Serial.println("New emotion displayed. Scan the correct RFID tag.");
}
void handleRFIDTag() {
if (rfid.PICC_IsNewCardPresent() && rfid.PICC_ReadCardSerial()) {
if (checkTagMatch(rfid.uid.uidByte, correctTag)) {
Serial.println("Correct tag! Well done!");
setHappy(); // Set to happy state (rainbow effect for about 20 seconds)
showRandomEmotion(); // Show new random emotion after happy state
lastEmotionChangeTime = millis(); // Reset the timer
} else {
Serial.println("Wrong tag. Try again.");
blinkAngry();
}
rfid.PICC_HaltA();
rfid.PCD_StopCrypto1();
}
}
void setPink() {
for (int i = 0; i < NUM_PIXELS; i++) {
pixels.setPixelColor(i, pixels.Color(255, 20, 147)); // Deep pink
}
}
void setAngry() {
for (int i = 0; i < NUM_PIXELS; i++) {
pixels.setPixelColor(i, pixels.Color(255, 0, 0)); // Red for angry
}
}
void setSteady() {
for (int i = 0; i < NUM_PIXELS; i++) {
pixels.setPixelColor(i, pixels.Color(0, 255, 0)); // Green for steady
}
}
void setHappy() {
unsigned long startTime = millis();
while (millis() - startTime < 20000) { // Run for about 20 seconds
rainbowEffect();
}
}
void turnOffExtraLEDs() {
for (int i = NUM_PIXELS; i < TOTAL_PIXELS; i++) {
pixels.setPixelColor(i, 0, 0, 0);
}
}
bool checkTagMatch(byte* tagToCheck, byte* storedTag) {
for (byte i = 0; i < 4; i++) {
if (tagToCheck[i] != storedTag[i]) {
return false;
}
}
return true;
}
void blinkAngry() {
for (int j = 0; j < 3; j++) {
setAngry();
pixels.show();
delay(200);
pixels.clear();
pixels.show();
delay(200);
}
// Restore the current emotion
switch (currentEmotion) {
case 0:
setAngry();
break;
case 1:
setSteady();
break;
default:
setPink();
break;
}
pixels.show();
}
void rainbowEffect() {
static int j = 0;
for(int i = 0; i < NUM_PIXELS; i++) {
int pixelHue = (i 65536L / NUM_PIXELS + j 256) & 0xFFFF;
pixels.setPixelColor(i, pixels.gamma32(pixels.ColorHSV(pixelHue)));
}
turnOffExtraLEDs();
pixels.show();
delay(50); // Slower, more gentle transition
j = (j + 1) % 256; // Slower color cycle
}
OUTCOME
Tamagotchi Cube demonstrates how simple sensor inputs and structured behavioral logic can create perceived emotional depth.
Rather than relying on complex AI or screens, the project shows that presence and attachment can emerge from well-tuned feedback loops.
Future iterations would introduce:
Long-term memory states
Gradual emotional evolution over time
Expanded care inputs
Subtler light behavior variations
REFLECTION
This project strengthened my understanding of system-driven design — particularly how minor adjustments in timing, transition curves, and behavioral sequencing dramatically influence user perception.
It reinforced my interest in designing responsive objects that operate through behavior rather than interface
Designed by Luna Park. 2025